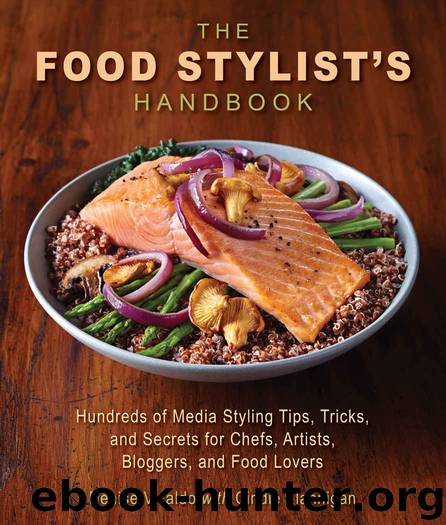
The Food Stylist's Handbook: Hundreds of Media Styling Tips, Tricks, and Secrets for Chefs, Artists, Bloggers, and Food Lovers by Denise Vivaldo & Cindie Flannigan

Author:Denise Vivaldo & Cindie Flannigan [Vivaldo, Denise]
Language: eng
Format: mobi, azw3
Publisher: Skyhorse Publishing
Published: 2017-07-31T16:00:00+00:00
Here are some easy tricks for you to apply to your food photos.
10 Tips for Making Food Photos Appetizing
1. Undercook your food. Food loses moisture as it cooks and shrinks as it cools. Cook food only long enough so that it no longer looks raw. You can always color too-light areas or apply heat with a kitchen torch.
2. Have extra of whatever you’re photographing so you can fill holes, prop up, or replace anything that doesn’t look good. For example, have enough product to make two ham sandwiches—one to make your “hero” sandwich to photograph, and extra of everything to use for patching or replacing.
Food placement, lighting, and props should keep the viewer’s eye engaged, interested, and moving around the image.
3. Photos magnify mistakes so make sure your prep is meticulous. Go through the product and get rid anything wilted, old, or unsightly. Cut, chop, and slice precisely.
4. When designing a plate, consider color (contrasting or complementary), texture, and balance. It makes for a more interesting picture to have elements that are distinct from each other: i.e., creamy and crunchy, large and small, light and dark. If all your elements are similar consider separating them by putting them in separate bowls or plates to put a frame around them and make them distinct from each other.
5. Create elevation and movement. Prop pieces up from the back for greater definition. Make a hidden base under food to hold it in place, using masa dough, shortening, damp paper towels, cosmetic wedges, or even stiff mashed potatoes.
6. Plan for the use of garnishes. Have appropriate herbs, lemons or limes, or extra ingredients on hand if needed. As well as adding interest, garnishes can be used to hide cracks or burns, separate elements, or draw the eye in a certain direction.
7. Know that cool food photographs better than hot food. Make cool or room temperature food look hot by adding moisture and shine. Brush with oil or mist with spray oil. You can also spray your food with water or brush with a little corn syrup. Take a test photo to determine where the light is hitting your food—brush or spray on these areas to give your food extra life. Don’t saturate your food with oil or it will lose texture; brush on sparingly to enhance contrast and bring out highlights.
8. Use any available light. Use a sheet pan, a white cutting board, or a small mirror as a reflector for added light. Prop up white foam core opposite your light source to bounce light back onto the shadowed side of your food.
9. Less is more. Appreciate how the camera’s eye is different than your eye. You don’t need to have a sliced mushroom in every square inch of food to know it’s there two or three will get your point across without making the image messy. Look in your viewfinder to determine what needs to be moved.
10. Have a clear vision of what you want to communicate. Do you want to show off
Download
The Food Stylist's Handbook: Hundreds of Media Styling Tips, Tricks, and Secrets for Chefs, Artists, Bloggers, and Food Lovers by Denise Vivaldo & Cindie Flannigan.azw3
This site does not store any files on its server. We only index and link to content provided by other sites. Please contact the content providers to delete copyright contents if any and email us, we'll remove relevant links or contents immediately.
| Color | Darkroom & Processing |
| Digital Editing | Equipment |
| Flash Photography | Handbooks & Manuals |
| Lighting | Reference |
Shoot Sexy by Ryan Armbrust(17142)
Portrait Mastery in Black & White: Learn the Signature Style of a Legendary Photographer by Tim Kelly(16484)
Adobe Camera Raw For Digital Photographers Only by Rob Sheppard(16387)
Photographically Speaking: A Deeper Look at Creating Stronger Images (Eva Spring's Library) by David duChemin(16161)
Bombshells: Glamour Girls of a Lifetime by Sullivan Steve(13108)
Art Nude Photography Explained: How to Photograph and Understand Great Art Nude Images by Simon Walden(12348)
Perfect Rhythm by Jae(4621)
Pillow Thoughts by Courtney Peppernell(3397)
The Book of Joy by Dalai Lama(3218)
Good by S. Walden(2915)
The Pixar Touch by David A. Price(2740)
Fantastic Beasts: The Crimes of Grindelwald by J. K. Rowling(2543)
A Dictionary of Sociology by Unknown(2518)
Humans of New York by Brandon Stanton(2379)
Read This If You Want to Take Great Photographs by Carroll Henry(2303)
Stacked Decks by The Rotenberg Collection(2270)
On Photography by Susan Sontag(2130)
Photographic Guide to the Birds of Indonesia by Strange Morten;(2088)
Insomniac City by Bill Hayes(2084)
