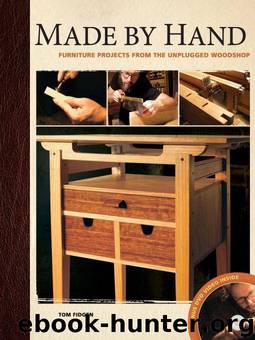
Made by Hand: Furniture Projects from the Unplugged Woodshop

Author:Fidgen, Tom [Fidgen, Tom]
Language: eng
Format: mobi
Publisher: Popular Woodworking Books
Published: 2009-12-04T08:00:00+00:00
THE TENON
Again, starting with freshly planed, square stock, mark off the shoulders of the tenon using your marking gauge of choice. From here we can establish the width and length either with a ruler and by measuring the mortise opening, or by laying the tenon stock over the mortise and actually scribing the thicknesses. This eliminates any errors that can occur during measuring. I’m actually one who uses a measuring tape or ruler only when I absolutely need to. If I can, I always prefer scribing a piece laid off of its mate, or perhaps when determining the length of a component, then again I’ll lay the piece into its desired finished place and scribe its finished length instead of measuring it.
Once we have the tenon scribed it’s time to chuck the piece into your vise and make some saw dust. I start off with the long cheek cuts of the tenon followed by the cross cut determining the tenon’s length. Something to consider when laying out your joinery is the depth of the tenons cheeks. If you’re building a substantial piece which could easily have a tenon in the 2½”-deep neighborhood, does your saw have enough depth in it’s plate to cut them out?
Since you’ll be ripping the wood, (cutting down through the end grain), you’ll have to use a rip saw.
For shallow tenons I’ll grab my dovetail saw and proceed as normal however, when I’m dealing with larger joints, the brass back of the backsaw will bottom out at the top of the kerf preventing me from completing my cut. This can be one of those occasions where it’s nice to have the luxury of simply reaching for your larger, rip style carcass or full-size tenon saw. Having the extra blade depth is really handy in larger joinery applications.
One alternative is to purchase a reasonably priced Japanese style Ryoba saw. These saws have no backs and have both cross-cut and rip pattern teeth. This can be used to complete the cut if your smaller rip saw bottoms out before you reach your desired depth.
Download
This site does not store any files on its server. We only index and link to content provided by other sites. Please contact the content providers to delete copyright contents if any and email us, we'll remove relevant links or contents immediately.
| Decorative Arts | Design History & Criticism |
| Furniture Design | Industrial & Product Design |
| Interior & Home Design | Jewelry Design |
| Textile & Costume |
POP by Steven Heller(2885)
Japanese Design by Patricia J. Graham(2556)
The Power of Broke by Daymond John(2377)
Architecture 101 by Nicole Bridge(2352)
Fusion 360 for Makers by Lydia Sloan Cline(1987)
Indistractable: How to Control Your Attention and Choose Your Life by Nir Eyal(1936)
Origami Art by Michael G. Lafosse & Richard L. Alexander(1737)
Actionable Gamification: Beyond Points, Badges, and Leaderboards by Yu-kai Chou(1724)
Batik by Rudolf Smend(1720)
Homebody by Joanna Gaines(1711)
Worn in New York by Emily Spivack(1619)
Feng Shui by Stephen Skinner(1616)
Whiskey in a Teacup by Reese Witherspoon(1577)
Austin Kleon by Steal Like an Artist(1537)
Don't Make Me Think, Revisited: A Common Sense Approach to Web Usability by Steve Krug(1530)
Simple Gatherings by Melissa Michaels(1512)
Hygge: The Danish Art of Happiness by Marie Tourell Søderberg(1429)
The Joy of Hygge by Jonny Jackson(1342)
The Laws of Simplicity by John Maeda(1301)
